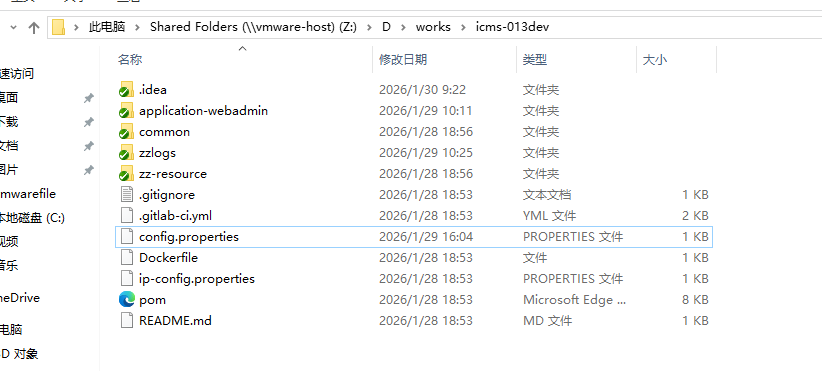
最近因为与一间央企合作,在VMware的虚拟机搭建了一个VPN,需要通过该VPN进行代码拉取及提交等工作。从宿主机共享文件夹至虚拟机。
直接在共享的文件夹内用git管理代码时,会报安全性提示。故在使用git或tortoiseGit更新前,先增加以下指令:
git config --global --add safe.directory '*'
最近因为与一间央企合作,在VMware的虚拟机搭建了一个VPN,需要通过该VPN进行代码拉取及提交等工作。从宿主机共享文件夹至虚拟机。
直接在共享的文件夹内用git管理代码时,会报安全性提示。故在使用git或tortoiseGit更新前,先增加以下指令:
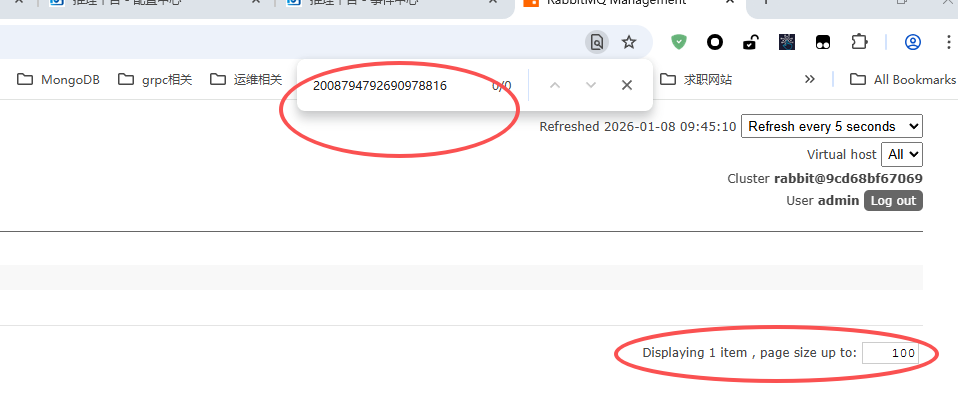
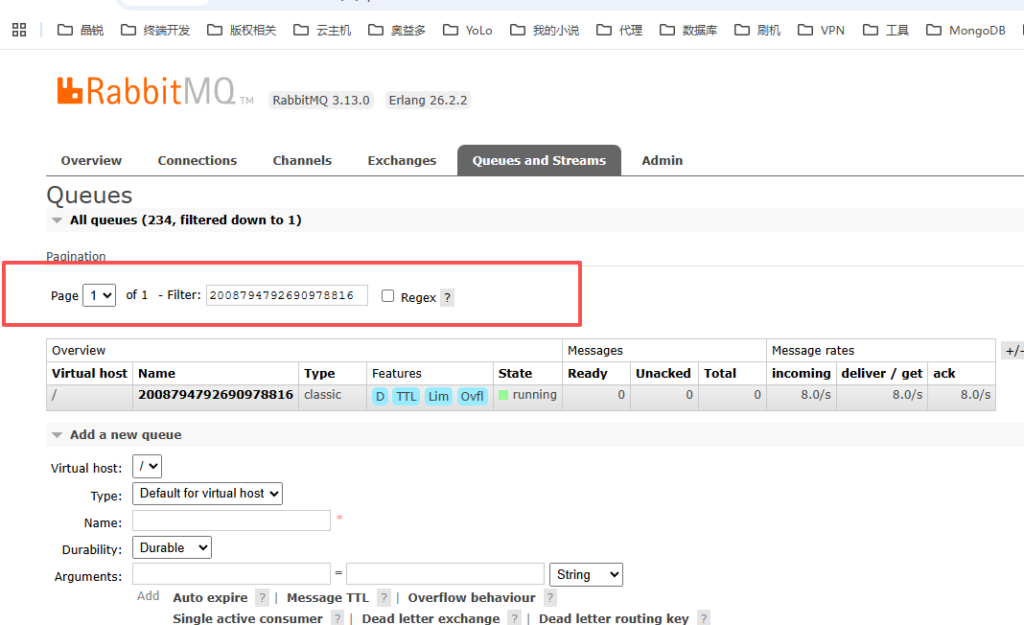
git config --global --add safe.directory '*'在之前,会直接利用浏览器的上的搜索框去匹配,但实际是错误的,因为RabbitMQ的列表是一个分页列表,如下所示,这种方式只能搜索当前显示的页内容。应该利用RabbitMQ自身提供的Queue过滤器去过滤,那样能过滤出自已所期望的内容,如下图二
https://github.com/obsproject/obs-studio/releases
https://github.com/iamscottxu/obs-rtspserver
第一步先安装OBS-Studio-32.0.4-Windows-x64-Installer
第二步再安装插件obs-rtspserver-v3.1.0-windows-installer
在C:\Program Files\obs-studio\obs-plugins\64bit目录下,能看到OBS的各种插件,其中obs-rtspserver.dll插件
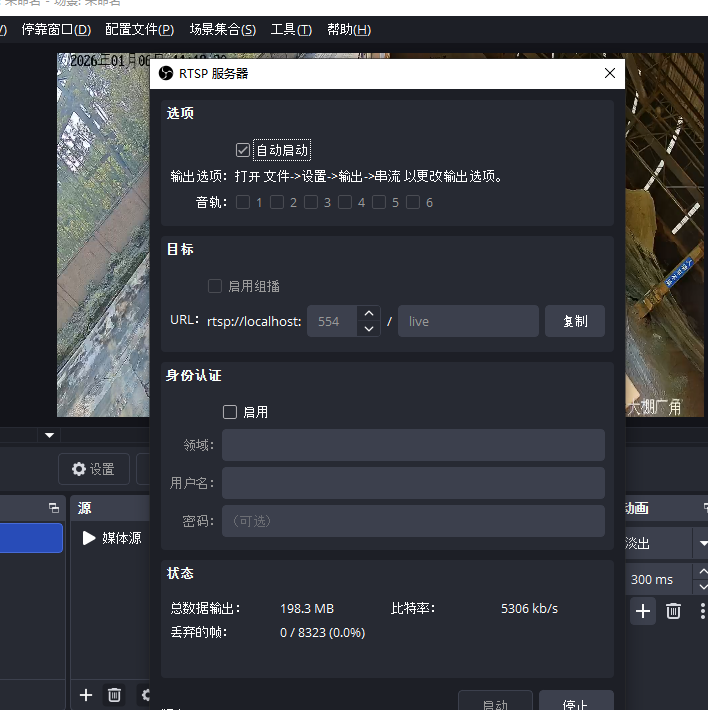
RTSP的服务器入口:
工具 =》【RTSP服务器】
在windows中直接使用nginx调试程序,增加一个脚本控制程序。
@echo off
chcp 65001 > nul
title Nginx Management Ultimate Script (Windows)

:: Force set variables with quotes, avoid empty value issues
set "NGINX_EXE=nginx.exe"
set "USER_CHOICE="

:: Step 1: Check nginx.exe existence (compatible with all paths)
if not exist "%NGINX_EXE%" (
    echo Error: %NGINX_EXE% not found in current directory!
    echo Please put this script in Nginx root folder.
    pause
    exit /b 1
)

:: Core loop (menu auto return)
:MENU_LOOP
cls

:: Step 2: List current Nginx processes (stable command)
echo ==============================================
echo          Current Nginx Processes
echo ==============================================
tasklist /fi "IMAGENAME eq %NGINX_EXE%" 2>nul
if %ERRORLEVEL% EQU 1 (
    echo No running Nginx processes found.
)
echo ==============================================
echo.

:: Step 3: Display menu (no truncated text, no special characters)
echo          Nginx Management Menu
echo ==============================================
echo  1. Start Nginx (Pre-check)
echo  2. Stop Nginx (Pre-check)
echo  3. Restart Nginx (Stop + Start)
echo  0. Exit Script
echo ==============================================

:: Step 4: Get user input (force clear previous value, avoid residual)
set "USER_CHOICE="
set /p "USER_CHOICE=Please enter number (0-3): "

:: Step 5: Operation logic (USE GOTO INSTEAD OF IF/ELSE IF - core fix for parsing error)
:: This avoids the nested if/else if parsing conflict that causes ". was unexpected"
if "%USER_CHOICE%"=="1" goto START_NGINX
if "%USER_CHOICE%"=="2" goto STOP_NGINX
if "%USER_CHOICE%"=="3" goto RESTART_NGINX
if "%USER_CHOICE%"=="0" goto EXIT_SCRIPT
:: Invalid input
echo.
echo Error: Invalid input! Only 0,1,2,3 are allowed.
goto AFTER_OPERATION

:: ---------------------- Start Nginx Logic ----------------------
:START_NGINX
echo.
echo [Start Nginx] Checking process status...
tasklist /fi "IMAGENAME eq %NGINX_EXE%" 2>nul | find /i "%NGINX_EXE%" >nul
if %ERRORLEVEL% EQU 0 (
    echo Info: Nginx is already running! No operation performed.
) else (
    echo Info: Nginx not running. Starting now...
    start /b "" "%NGINX_EXE%"
    if %ERRORLEVEL% EQU 0 (
        echo Success: Nginx started successfully!
    ) else (
        echo Error: Failed to start Nginx! (Port occupied or permission denied)
    )
)
goto AFTER_OPERATION

:: ---------------------- Stop Nginx Logic ----------------------
:STOP_NGINX
echo.
echo [Stop Nginx] Checking process status...
tasklist /fi "IMAGENAME eq %NGINX_EXE%" 2>nul | find /i "%NGINX_EXE%" >nul
if %ERRORLEVEL% EQU 0 (
    echo Info: Nginx found. Killing processes...
    taskkill /f /im "%NGINX_EXE%" >nul 2>nul
    :: Verify stop
    tasklist /fi "IMAGENAME eq %NGINX_EXE%" 2>nul | find /i "%NGINX_EXE%" >nul
    if %ERRORLEVEL% EQU 1 (
        echo Success: Nginx stopped successfully!
    ) else (
        echo Error: Failed to kill Nginx processes!
    )
) else (
    echo Info: Nginx is not running! No operation performed.
)
goto AFTER_OPERATION

:: ---------------------- Restart Nginx Logic ----------------------
:RESTART_NGINX
echo.
echo [Stop Nginx] Checking process status...
tasklist /fi "IMAGENAME eq %NGINX_EXE%" 2>nul | find /i "%NGINX_EXE%" >nul
if %ERRORLEVEL% EQU 0 (
    echo Info: Nginx found. Killing processes...
    taskkill /f /im "%NGINX_EXE%" >nul 2>nul
    :: Verify stop
    tasklist /fi "IMAGENAME eq %NGINX_EXE%" 2>nul | find /i "%NGINX_EXE%" >nul
    if %ERRORLEVEL% EQU 1 (
        echo Success: Nginx stopped successfully!
    ) else (
        echo Error: Failed to kill Nginx processes!
    )
) else (
    echo Info: Nginx is not running! No operation performed.
)
echo.
echo [Start Nginx] Checking process status...
tasklist /fi "IMAGENAME eq %NGINX_EXE%" 2>nul | find /i "%NGINX_EXE%" >nul
if %ERRORLEVEL% EQU 0 (
    echo Info: Nginx is already running! No operation performed.
) else (
    echo Info: Nginx not running. Starting now...
    start /b "" "%NGINX_EXE%"
    if %ERRORLEVEL% EQU 0 (
        echo Success: Nginx started successfully!
    ) else (
        echo Error: Failed to start Nginx! (Port occupied or permission denied)
    )
)
goto AFTER_OPERATION

:: ---------------------- After Operation (Return to Menu) ----------------------
:AFTER_OPERATION
echo.
:: echo Press any key to return to menu...
:: pause >nul
goto MENU_LOOP

:: ---------------------- Exit Script ----------------------
:EXIT_SCRIPT
echo.
echo Exiting script...
pause >nul
exit /b 0以后可以直接下载并使用SQLyog的社区版
从2025年11月23日同时安装Qt6.2.3及Qt6.9.3版本后,发现现在的Qt在线安装包先择结构已经升级了,并且只有且仅有QtCreator18的版本可选择了。这带来以下问题:
WoTerm在QtCreator18中是无法CMake通过的。报错如下

然后无法正常编译WoTerm项目。其解决方法是手动安装与Qt6.2.3高度匹配的QtCreator版本。经查核只有8.0.2的版本才支持导入Qt的SDK。
Qt团队于2022年1月31日发布了Qt6.2.3,而QtCreator8.0.2是2022年10月19日。
QtCreator9.0.2是2023年2月21日。Qt6.7.3版本后才支持VS2022的编译器版,而Qt 6.7.3于2024年9月27日发布。
Qt Creator 10.0.2 对 Qt 框架是完全支持Qt5.15.x / Qt6.2.x/6.5.x均是全支持。
Qt Creator 12.0.2对Qt5.15.x是兼容。
Qt Creator 9.0.2对Qt5.x及Qt6.2.x是全支持,而Qt6.3.x/6.4.x等是基础支持。
故此当前适合在线安装版qt-online-installer-windows-x64-4.10.0.exe形式,是安装SDK,而QtCreator分离形式安装。的最佳搭配是:
https://download.qt.io/archive/qtcreator/10.0/10.0.2/qt-creator-opensource-windows-x86_64-10.0.2.exe
安装Markdown Preview Mermaid Support插件,支持多种流程图
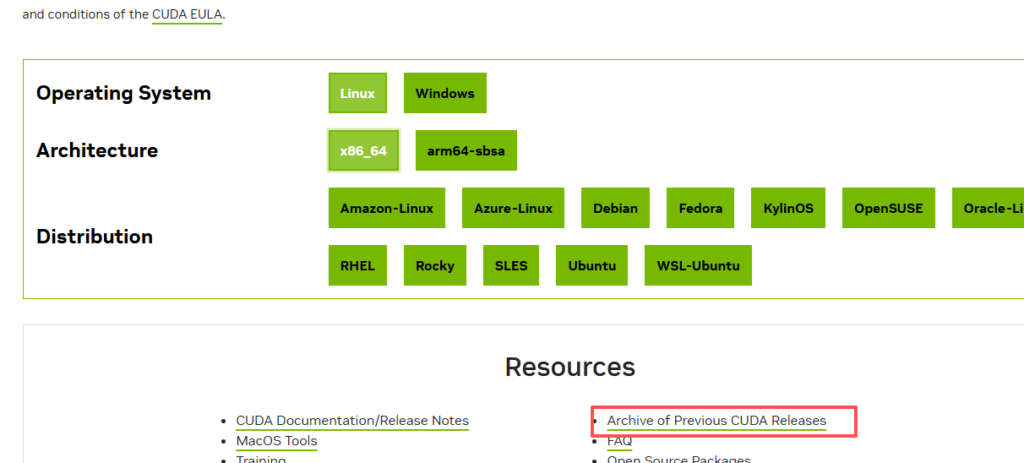
https://developer.nvidia.com/cuda-downloads 在该页面下有历史版本入口
https://developer.nvidia.com/cuda-toolkit-archive
https://developer.nvidia.com/tensorrt download on official website or github.
choose the right package base on your GPU, it offer RTX/LLM/Cloud etc.
https://github.com/NVIDIA/TensorRT/releases Download to compile

https://developer.nvidia.com/cudnn-downloads
https://developer.nvidia.com/cudnn-archive

在VSCode中调试F5,其.vscode/launch.json有特殊编写要求的,经测试以下方式可行。
"version": "0.2.0",
"configurations": [
{
"name": "Debug wopay",
"type": "go",
"request": "launch",
"mode": "debug",
"program": "${workspaceFolder}/src",
"cwd": "${workspaceFolder}",
"output": "${workspaceFolder}/wopay",
"showLog": true,
"trace": "verbose",
"buildFlags": "-o ${workspaceFolder}/wopay",
"env": {
"GOPATH": "${workspaceFolder}",
"GO111MODULE": "off"
}
},
{
"name": "Debug wopay (with modules)",
"type": "go",
"request": "launch",
"mode": "debug",
"program": "${workspaceFolder}/src",
"cwd": "${workspaceFolder}",
"output": "${workspaceFolder}/wopay",
"showLog": true,
"trace": "verbose",
"buildFlags": "-o ${workspaceFolder}/wopay"
}
]
}